
Main Concepts
One of the most critical parts of making an artwork like this is the lighting. You can use a set of lamps, or a good studio HDR. The important thing is to get a lot of contrasting light sources to give complex reflections and to add visual interest to otherwise solid polygons.
To continue with the contrasting theme, we will also give the materials very contrasting colors. A high Depth of Field can also help add some more visual interest to the artwork.
Creating the Geometry
1. Generating the base mesh
Start by adding a simple plane to your scene, and adding a Subdivision Surface modifier:


Next you will want to add a Decimate and a Displace modifier:

2. Creating the wire highlights
To do this, simply duplicate the mesh and move it upwards on the Z axis, and then add a Wireframe and Subdivision Surface modifier as shown (make sure to keep it below the displace modifier):
 |
| Make sure that 'Crease Edges' is checked |
3. Adding the spheres at the joints
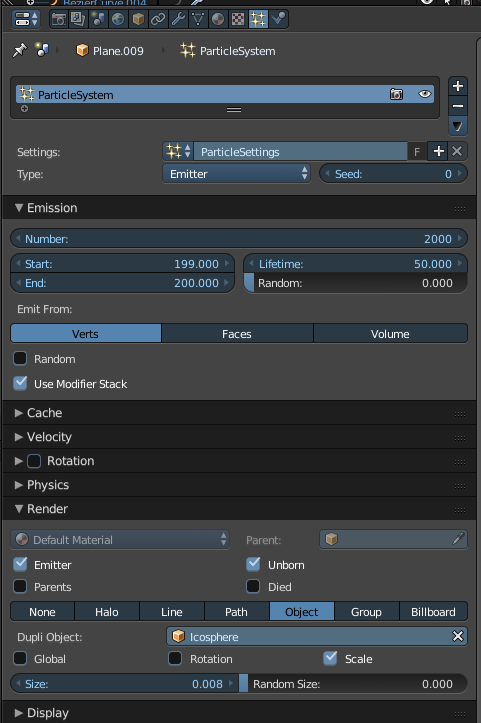
To do this we will just use a particle system set to emit from vertices and to show unborn particles. Start by adding a particle system and moving it up the modifier stack:

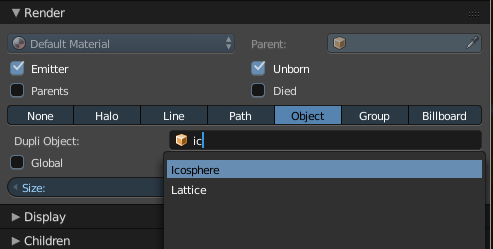
Now add an icosphere and go back to the particle system settings and add it as the duplication object:

Change the particle settings as shown:
Change the particle settings as shown:
Adding materials and camera setup
Now we will add basic glossy materials, position the camera in a good position, and render the image out. Remember to add some DoF as well. Feel free to add a sphere with a different color to add a focal point to the image if so desired:


0 comments:
Post a Comment